If you’ve finally finished the hard work of writing and editing your book, you might be wondering how to make a hardcover book.
While ebooks are certainly on the rise, printed books are still the preferred format amongst readers. Printed books out-sell ebooks 4-to-1, which is why any author should consider making sure their books are available in printed form.
While there are a lot of options out there to create a hardcover book, the easiest choice for authors is the Kindle Direct Publishing (KDP) program through Amazon.
If you already sell books, you most likely already have a book published on Amazon. If so, the steps to create a hardcover option are not too different.
This guide will walk you through the main steps of publishing on KDP so you will have it up and ready to go by the end of this article.
Whether you’re new to the program or are doing it again, this guide will help each level of experience.
What is Kindle Direct Publishing?
Kindle Direct Publishing, also referred to as KDP, is the publishing platform on Amazon.
Amazon is one of the biggest companies in the world for book sales, so having the option of selling a hardback book to customers is extremely appealing for authors.
Thankfully, Amazon makes the process pretty easy and straightforward. You don’t need extensive technical knowledge to be able to upload and print your book. (If you do run into any issues along the way, they have a great support team to help.)
As an author, it’s likely you already use them or have some of your paperback or digital ebooks sold through the platform.
If you’ve already gone through this process for your paperback versions, you might be a seasoned pro at these steps. The biggest difference here will be in your cover requirements.
How to make a hardcover book
While there are a lot of options to publish a hardcover book, including even going the DIY-approach and making your own, going through Kindle Direct Publishing is an option that will save you a ton of headaches.
KDP Publishing
Most authors who publish on Amazon are aware of Kindle Direct Publishing (KDP).
If you’re not, it is essentially the publishing area of Amazon.
Don’t let the name fool you, it doesn’t only mean books published on Kindle, they also offer paperback and hardcover book publishing as well, which is the current area we’ll be focusing on.
KDP Pricing and Royalties
At the time of writing this article, KDP offers a fixed 60% royalty rate on all sales of your hardcover book.
Their exact formula is:
(Royalty rate x list price) – printing costs = royalty
To figure out printing costs, you’ll have this exact formula:
Fixed cost + (page count * per page cost) = printing cost
What you’ll need to create your hardcover book on KDP
To create your hardcover book on Kindle Direct Publishing, you’ll need a few things ready to go before you can publish your hardcover book.
The things you will need include:
- Cover for your book
- Interior files formatted and ready to go (ideally a PDF for a hardcover book, but you can also do a .doc, .docx, .html or .rtf)
- Know what print or distribution options you want
- Decide if you need proof or author copies
- A unique ISBN for your hardcover edition (you’ll need this even if you already sell the book in paperback)
- Keywords for KDP
- Categories list
What are the printing options for hardcover books on KDP?
You’ll want to see the diagram and steps that Amazon provides here, to see all of the printing options and details.
Both softcover and hardcover books have the same options, the only exceptions are:
- Five available trim sizes for hardcover books
- Minimum page count is 75 with maximum page count being 550
The steps to create your hardcover book
Now that you have everything ready to go, it’s time to login to your KDP account and start putting it together.
If you don’t have an account, you’ll need to make one now before we move onto the next steps.
KDP accounts are free to make but you will need to enter author, payment, and tax information before you can get paid with your book.
Log in to your account
Go to this link and log into your KDP account.
Once you’re inside the account, you should be able to see a “create” button. Here’s what it should look like (at the time of publishing this article):
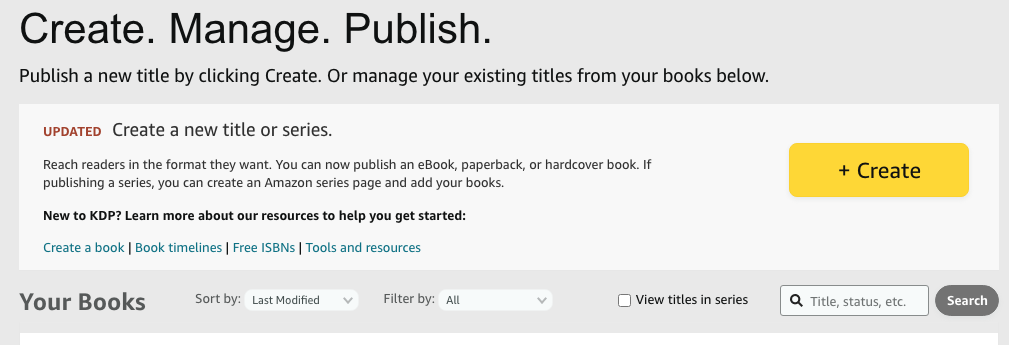
If you’re going to turn a current ebook or paperback book on Amazon into a hardcover book, the buttons might look different but you should see a Create button somewhere.
Tax info/etc
Real quick note — you might need to fully set up your account, add in some tax information, and give Amazon a few other basic requirements before you can move forward.
Once you’ve done that, you can carry on with these steps.
Once you select “create” from above, you’ll come to this screen:
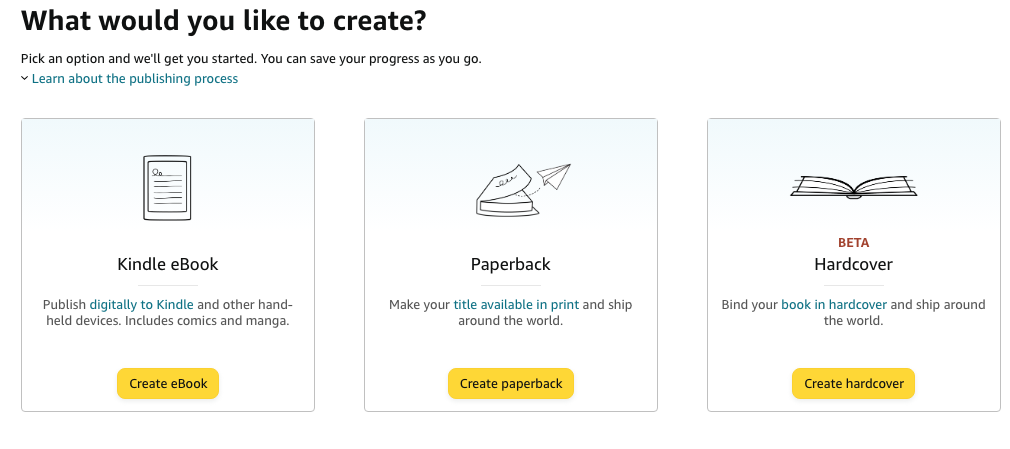
You’ll want to select the hardcover option.
Now that you’ve selected the hardcover option, you’ll come across this page where all of that information you gathered before now is relevant.
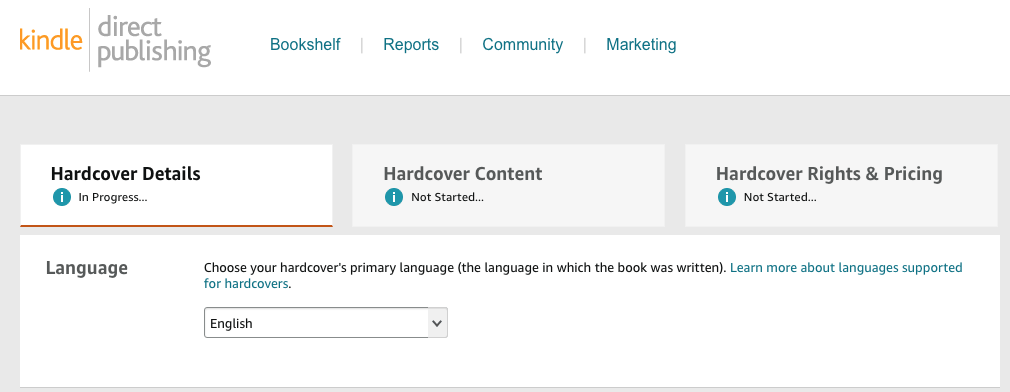
Submit your title and subtitle
The subtitle is optional to enter, but the title of the book can’t be skipped.
Once you’ve titled your book, you’ll also need to enter:
- The series — if it’s part of a series or is the start of a new one
- Edition number
- Author — if you use a pen name, you can insert that instead
- Contributors — don’t forget to include your book editor, cover designer, narrator, foreword contributor, illustrator, or anyone else who helped bring your book to life
- Description — take the time to make this sound as intriguing as possible! This will not only convince readers to buy it, but the algorithm will figure out how you describe the book and use those words to help others find your book
- Publishing rights
- Keywords (choose up to 7)
- Categories
Entering all of that information will get you through the first page.
A brief discussion of keywords: You might not think keywords are important, but they are how people will find your book. These are the words people will search for and if you pick the right ones, your book will pop up as a recommendation.
There are plenty of keyword search tools online that will help guide you in the right direction if you’re stuck.
Upload your hardcover content
Once you’ve done all of the steps above, it’s now time to upload your book cover and the book itself.
You’ll also need to add in the ISBN for this hardcover book because your ISBN changes with each edition, meaning your paperback, audiobook, and hardback all have different ISBNs.
If you’re only uploading to Amazon, they will provide you with a free ISBN.
But if you’re going to publish a hardcover anywhere else (Ingram, Lulu, etc), you’ll need to purchase a new ISBN and make sure that the back cover for the hardback has the correct ISBN.
Now that we have the ISBN debacle out of the way, at this step you’ll also need to:
- Upload your manuscript and cover files
- Pick your print options
- Preview your book and make sure it’s looking the way you want it to
- Order a proof
Hardcover rights and pricing
This step is easier than the others. You simply need to pick the territories where you have distribution rights and decide on a price. We recommend always ending in xx.99, since that is industry standard.
Can you create a hardcover from a paperback?
Inside of your Bookshelf, there should be a “create” option where you can go through the same steps above, but it might autofill some of the basic information such as the title.
Pro tip: Consider using a slightly different variation of keywords and categories for your paperback. That way you can get into more nooks and crannies of Amazon and see where your book gains the most traction.
- Further reading: How to Print Your Book (outside of Amazon)
You’re ready to sell!
Now that you’ve gone through all of these steps, you should be able to list and sell your book on Amazon.


